Transplanting a rose bush is not as difficult as you might think. With a little care in removing the bush, chance of success are excellent.
There are many reasons you may need to move a rose, or any bush or tree for that matter. Perhaps you need to make way for construction on your property, perhaps the rose is not thriving due to changed light and water conditions, or perhaps you just want it in a different spot. Whatever the reason, you don’t have to worry about killing your rose if you know how to minimize trauma to the plant. Although we consider the rose to be a temperamental plant that requires the most care while transplanting, that is not necessarily so. Roses, particularly hybrid teas, are finicky about the sun, soil and water requirements, but are a pretty tough and resilient plant overall. Roses of any variety, as well as many shrubs or trees, will not like to have their roots exposed or be deprived of water, which transplanting can do. The preparations and transplant instructions for a rose are virtually no different than for transplanting a shrub or tree.
Ideally, any plant should be moved while dormant. Since the plant is not growing, it won’t go into transplant shock. However personal schedules and gardening schedules just don’t always accommodate, so at least try to transplant when the weather is cool and damp if possible, whether that be spring or fall. If you must transplant in the heat of summer, do it in the cool of morning or evening, and on a cloudy day. Water, water, and more water will help a growing rose bush compensate for the loss of roots when you transplant. And in the heat of summer when the soil dries out quickly, even more water. As a matter of fact, water the rose deeply a day or two before the transplant. That will give your rose time to soak up as much water as possible and the soil will dry out enough to be workable - you don’t want to be working in mud.
Start by doing any necessary pruning to remove dead, crossed, weak or diseased canes as you would in spring. (See the complete spring pruning instructions.) You don’t need to severely prune back the rose to transplant, just thin and prune to the size you desire. If it is very large bush, pruning back to reduce size will make it easier to handle. Remember that the root ball, full of soil, will be quite heavy. With some help and a wheelbarrow you may be able to manage a large bush.
Next prepare your planting hole. Dig a generous hole, it can’t be to wide or too deep. Make sure there is plenty of room to spread out any roots that have been exposed, and dig in plenty of compost. (See the complete planting instructions.) When transplanting you don’t have a good idea of how large the root ball will be. If you have not been generous, your rose’s roots will be drying out in the sun and air while you enlarge the hole. Ideally the bush should go immediately into it’s new hole to minimize the drying damage. If it absolutely must sit for more than a minute or two, keep it out of the wind, in the shade, and cover the roots with a damp piece of burlap (or even an old sheet or towel).
Now for removing the rose bush from it’s existing home. You will of course need a shovel, a round point digging shove that is good and sharp will do just fine. And have ready a sturdy pruner and lopper. A piece of burlap may be helpful to place the root ball on for moving is helpful (or an old sheet or towel).
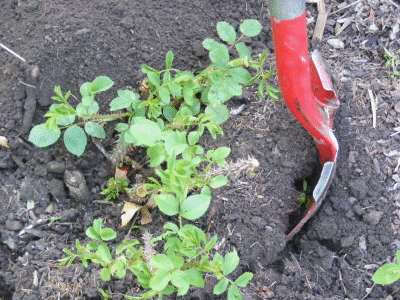
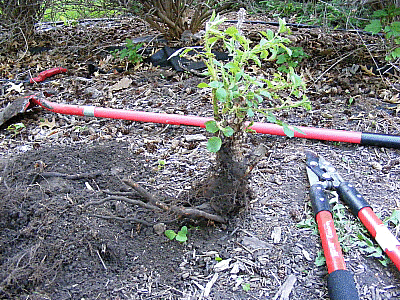
This rugosa rose has been overtaken by shade and is not thriving.
Over the last few years half the bush has died off, as evidenced by the remains of large dead cane stumps on the left. After a particularly harsh winter, the bush needed hard pruning down to about six inches - a perfect time to find a new home. Start by digging a wide circle around the bush. Place the point into the soil and push sharply deep into the soil with your foot to cut roots off cleanly. Completely circle the plant, then push the shovel deep under the plant to cut through lower roots until the plant will easily lift out.
Dealing with Roots
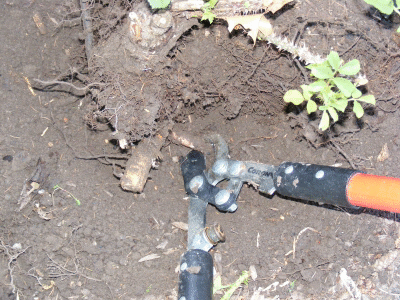
You may encounter roots that are too large for the shovel to cut through cleanly. Do NOT keep “hacking” into the root until it finally breaks through, as substantial trauma will be inflicted. Reach in and clear the soil away with your hands until you can clearly see the resisting root.
Large Roots
In this case the exposed root looks suspiciously large, and not typical of a rose bush. Although this rugosa rose grows to 7 feet tall, a root this large would be unusual. It is likely a root from a nearby tree, either way, the root needs to be clean cut to minimize damage to either the rose or the tree.

Clean Cut Roots
Cut the root cleanly with a sturdy pruner, or in this case, a large lopping pruner.

Reduce Trauma
The clean cut on this root will minimize trauma to the rose or the neighboring plant, allowing it to heal quickly. Now continue pushing your shovel in under the plant until it can be lifted out.
Carefully Expose Roots
Another resistant root deep under the plant requiring slow removal of nearly all the soil surrounding the roots. Be very gentle removing the soil so as not to damage the hair-like roots that are essential to water take up. The problem here has become clear, the rugosa roots are entangled with the large root of a neighboring tree. This plant is enduring significant trauma due to this difficult removal. But with the new planting hole ready and plenty of water, this rose will likely be good as new by mid summer.
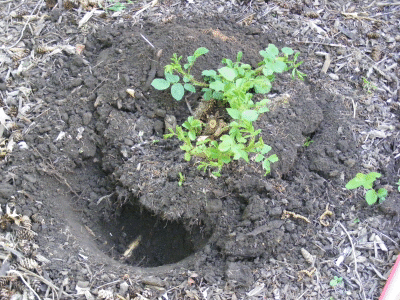
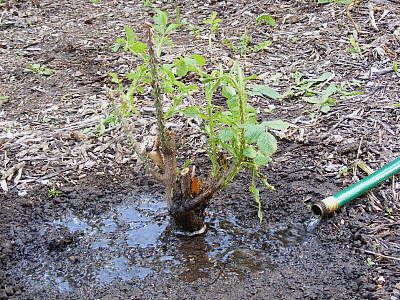
Finally Free
As you can see it wound up in a “bare root” state, which really only a dormant plant should find itself so exposed! But at least it is a very cool and overcast day, and it will be soaking up water momentarily. You can also see here how the left side has well developed roots, but the right side is nearly bare where the bush had been dying off due to limited sun and competition for water from encroaching roots.

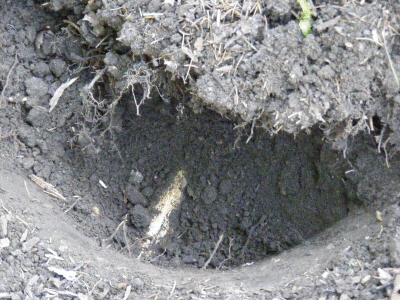
Generous Planting Hole
This hole is JUST large enough to spread the roots out. If the poor rose had not already been so traumatized, I might dig it a bit larger. However this is a well tilled, organically enriched bed, so I am not concerned.
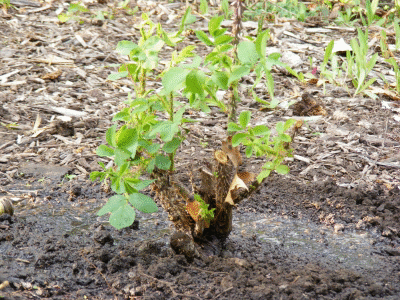
Fill and Water
Fill the hole with enriched soil and water well to settle the soil. Then fill again, and water again to settle. Continue until level with the surrounding soil, or slightly mounded to allow for more settling.
Fill and Water Again
This has been very thoroughly soaked, so little additional settling of soil will be expected. So far it looks pretty good, no leaves wilting yet - in hotter weather they already would have been wilting. Check back in a month or so to see it’s progress!
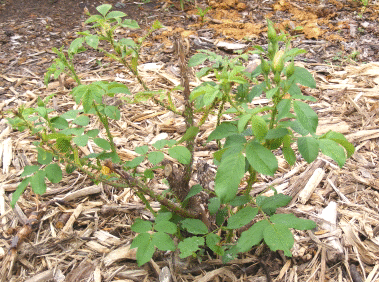
Healthy Growth
Four or five weeks later the rose is green, healthy, growing and ready to bloom!