dividing perennials
Over time, all perennials spread, either by increasing the "clump" size or spread underground, creating a whole new plant. Even if your intention is to allow your plants to take over a large area, dividing large perennial clumps is necessary to the health of the plant.
Periodically dividing can produce new plants exponentially if that is your objective. For successful division, there are a few guidelines to keep in mind.
These do not necessarily apply to ALL perennials, so as usual, ask your garden center staff or do your own research.

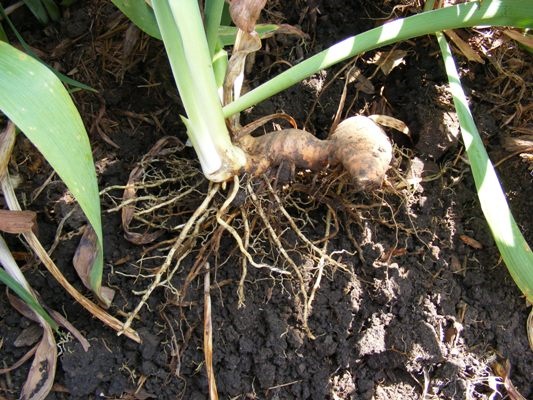
BEFORE - Needs to be divided
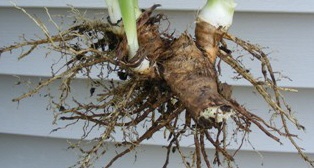
AFTER - Thinned and Refreshed
Before You Begin
Before you begin, how do you know when and if you should divide your perennial?
These are the signs that you need to divide:
Flower production has been reduced
The flowers are smaller than they used to be
The plant is not growing vigorously
The plant has become long, lanky, flops, and now needs staking
The center is dying
The plant has grown too large for its space
When To Divide Perennials
Dividing can generally be done in spring or fall, and tougher perennials can be divided gently anytime. It is best, however, to avoid the hottest weeks of summer.
If you prefer not to interrupt bloom cycles, spring-blooming plants should be divided after they bloom. Fall blooming plants are best done in spring when new shoots have appeared.
Split your bulbs and corms just after the foliage dies back in the fall for the best results. If you split them in the spring, it is likely they will not bloom that season.
Large clump of young Iris
Dividing In Fall
If you are dividing in the fall, generally, you should cut the plant back first. If the leaves rise directly from the soil, such as iris or daylilies, you should cut them back to about half. Others you can cut back to the base with sharp garden shears.
This will make your work easier and prevent the plant from putting energy into healing bruised, broken, and drying leaves. Many of the tough perennials, such as daylilies, will manage the healing pretty well.
Lift the plant out of the soil with a pitchfork. You will see small clumps of newer plants formed all around. Gently remove the clumps of about 6-12", simply breaking them off by grasping the root ball or bulb clump.
You can vary the division size based on your objective, but be sure you have some roots and some foliage in each division.
The smallest divisions will struggle more than the large ones to establish and will grow more slowly.
The old center of the plant should be discarded, and plant new divisions. When dividing plants with tuberous roots or rhizomes, such as bearded iris, separation should be more precise if possible.
Look for growth buds from the roots that have produced a new small plant. Using a sharp knife, cut out a section with at least one bud cleanly for your division (think of a carrot that has smaller carrot “buds” growing from it, producing the green tops)

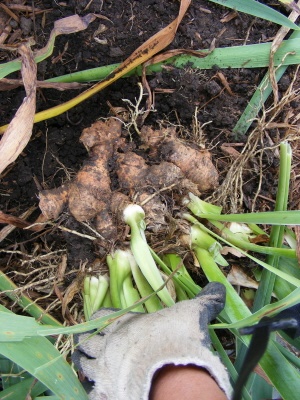
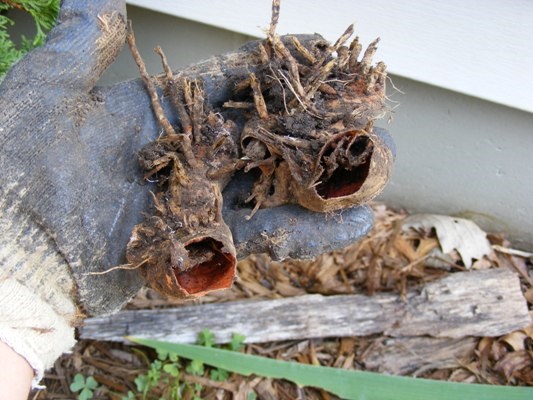
Exposed Iris rhizomes
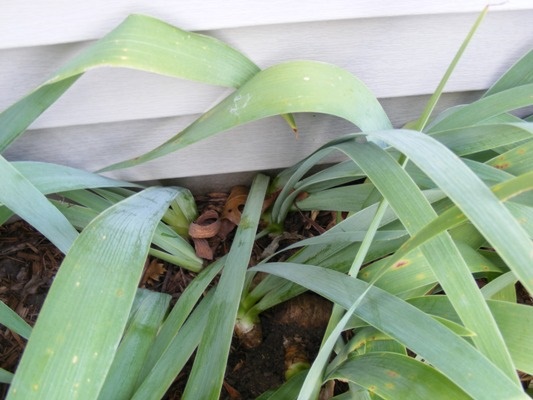
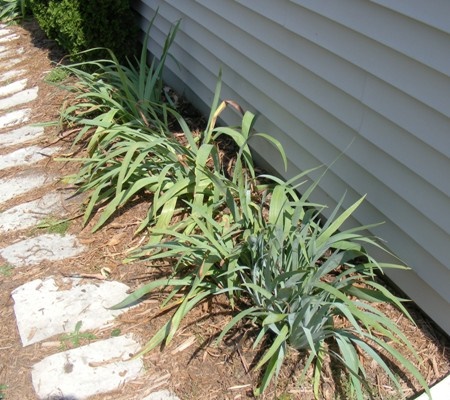
Clumps have spread too close to the structure
The exposed clump above has an old center with new young rhizomes surrounding it. Discard the old center and split off the young shoots.
In the lower photo, the iris has spread right up to the structure wall.
If they can be removed without damage they can be replanted. They may be difficult to remove without cutting and bruising the rhizomes, in which case they should be discarded
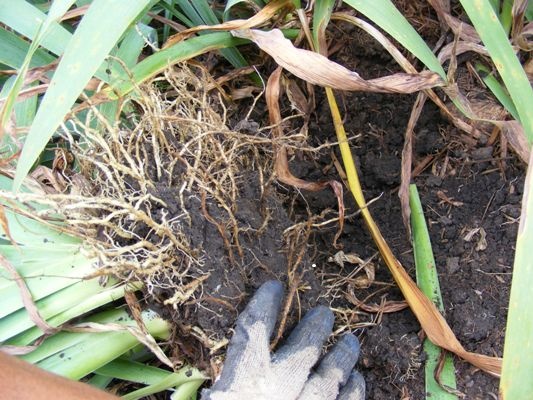
Gently remove the soil around the rhizomes
Perfect sized small clump for replanting
Lift the clump to be divided and gently remove as much soil as possible so you can clearly see the individual rhizomes to decide where to divide them.
Above, a nice small clump on the outer edge pulls off easily, but a sharp knife will be necessary to clean-cut other clumps away from the center.

Large old clump to discard
This large clump of iris is old and knotted, and should be discarded.
Dried up old rhizomes to discard
Dried up old rhizomes should be discarded
Perfect clump to replant
This is a nice size clump to plant, but it could be further divided into three sections if you like. Just make sure you get a complete rhizome with sufficient root with a clean cut.
Clay soils and older plants may not always be so cooperative about being lifted out and gently breaking apart.
Those plants are usually pretty tough, so if necessary, dig around the perimeter, slicing sharply through tough roots. Then position the shovel deep in the soil and slice under the plant. Hoist the large root ball out and see what you have to work with.
If it looks like you can ease clumps off, by all means do so. But rather than muscle them apart, a clean slice with a sharp shovel is kinder to the plant.
Just place the shovel tip in where you want the cut, and push sharply with your foot. Precision is difficult. Hopefully, you got a division with adequate root.
New planting holes should be prepared ahead of time, loosening the soil at the bottom of the hole and compost mixed in. The holes should be large enough to spread the roots out. Place your new division in the hole, cutting out and discarding any parts that were damaged. Leaves that rise directly from the soil should be planted at exactly the same depth.
If planted too deeply the leaves will rot. It is not quite so important if the leaves are on a stem, but do try to replant at the same depth. Fill the hole with soil, firm slightly, and water to settle soil under and around the roots. Add soil again to level if necessary and water again.
Fertilize LIGHTLY, ideally with a weak solution of water-soluble fertilizer. Water once or twice a week while the new plants are established, especially if in a hot sunny area.
The soil should stay moist but not wet until the roots begin to grow.
Certain perennials will develop problems other than just becoming overgrown if not divided periodically.
Crown rot may develop in Sedums, Hosta, Bee Balm (divide every 2 or 4 years in spring or fall), catmint, and other members of the mint family. Iris multiply rapidly, but blooming may be diminished if not divided every few years, discarding old centers